How to Install, Activate, and Update Obsidian Plugins
The biggest thing I don’t like about Obsidian is that it’s closed source, but the fact that you find or write a plugin to do just about anything you want mitigates that a lot. This article won’t cover writing a plugin, just using existing plugins, but I will get to writing that post eventually, because despite the hundreds of plugins available, I’ve had a few ideas for new ones.
Table of Contents
- Table of Contents
- Where to Install Obsidian Plugins
- Core Obsidian Plugins
- How to Install Obsidian Community Plugins
- Popular Community Obsidian Plugins
- How to Update Obsidian Plugins
- How to Install Beta Obsidian Plugins with BRAT
- How to Install Obsidian Plugins Manually
- How to Copy Plugins to a New Vault
- Obsidian Plugins that Work on Some Platforms But Not Others
- Don’t Forget to Activate and Configure
Where to Install Obsidian Plugins
You can skip this section if you already know where to install plugins in Obsidian, but I put it here for newbies. This brings up the irony of cross-platform apps. An app may be cross-platform, but that doesn’t mean it will act the same (in general, Obsidian does) or have the same UI (Obsidian doesn’t) across every platform.
Now that I think of it, the fact that you add plugins to a vault and not to the Obsidian application sort of threw me. It makes sense now that I have a better understanding of how Obsidian is structured. But initially, when I created my second vault, I wondered where all my plugins were.
Which means you might install the perfect set of plugins in one vault and you’ll just have to repeat the entire process in the next one you create. But in a section below, I’ll show you how to copy plugins to a new vault quickly.
Here is, in general, where you can reach the Obsidian Settings menu, which is where you manage plugins.
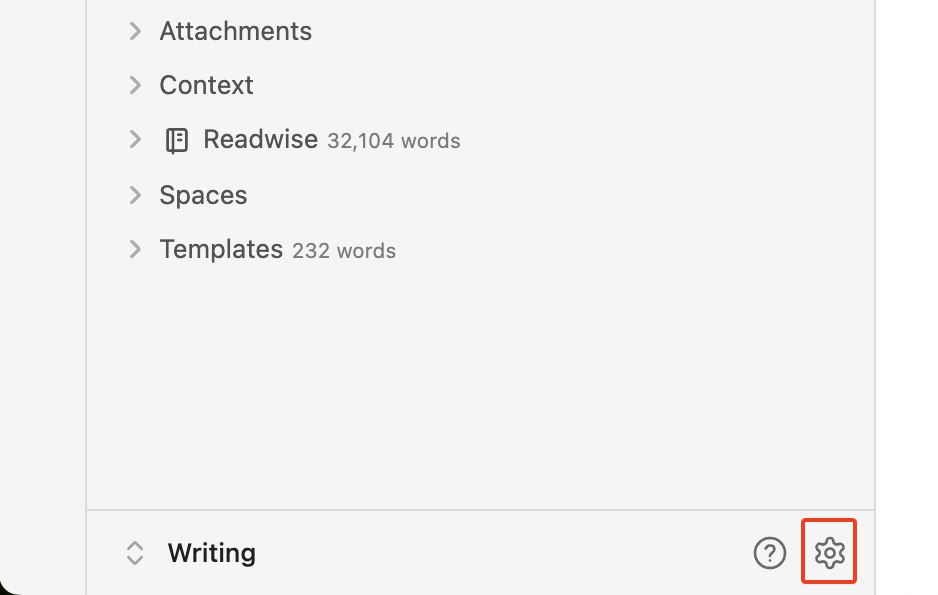
In the desktop app, you can get to Settings from the gear at the bottom of the side menu:
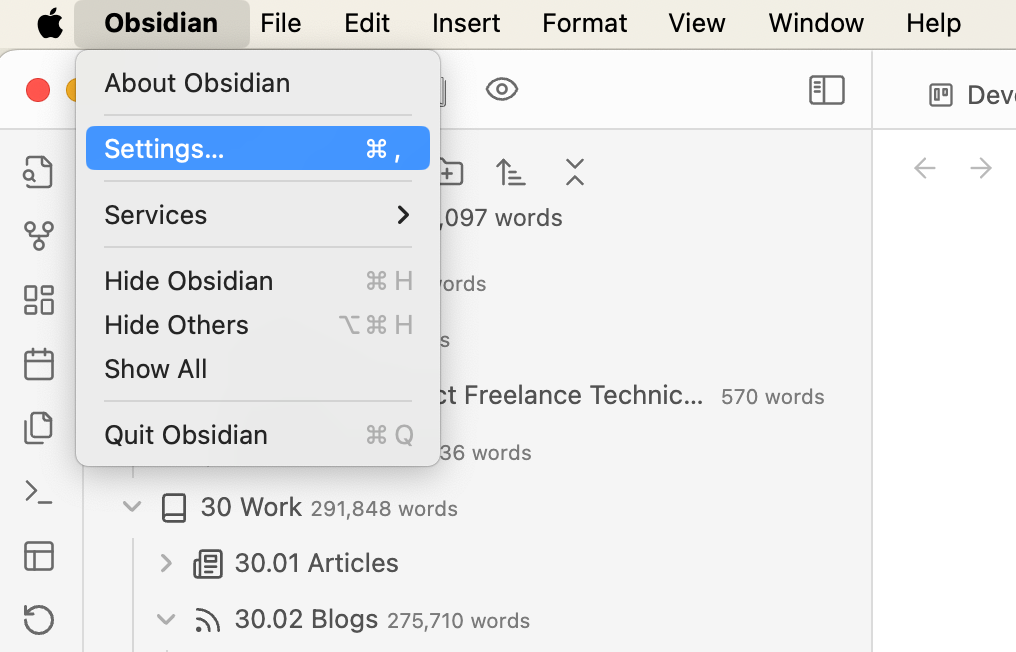
Or by going here:
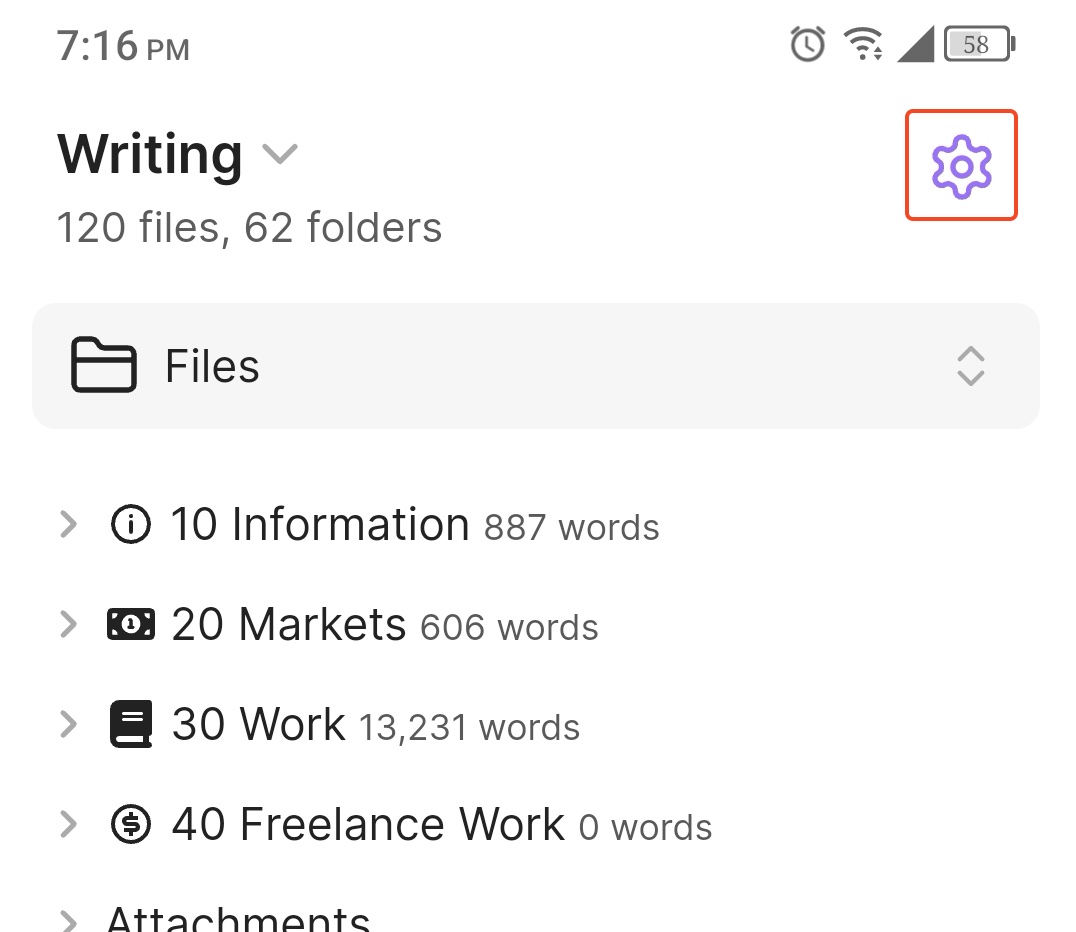
In the mobile app, you find the Settings menu by clicking the gear at the top of the side menu/drawer:
Core Obsidian Plugins
Did I ever tell you I like software with plugins? Well, I really like software where most of the core functionality is in plugins. I thought there was a term for this, like “plugin-first development”, but couldn’t find one. If there isn’t, there should be.
But it is nice to see when an application has “core” plugins. This usually means that even if the application isn’t open source, you get access too much of the same functionality that “core” developers do. You just have to write a plugin.
Here is a list of core Obsidian plugins. Not all are enabled by default:
| Plugin | Description | Enabled By Default |
|---|---|---|
| Audio recorder | Lets you record and save voice recordings in a note. | No |
| Backlinks | Shows you all the backlinks for the current note. | Yes |
| Bookmarks | Allows you to bookmark various things in your vault for quicker access. | Yes |
| Command palette | Gives you quick access to commands from your keyboard. | Yes |
| Daily notes | Create and open notes based on the current date. | Yes |
| File explorer | This is what shows up in the left side of Obsidian and lists all the files. | Yes |
| File recovery | Keeps snapshots of your notes so you can recover them if needed. | Yes |
| Format converter | Converts markdown from other apps to a format Obsidian can use. | No |
| Graph view | Let’s you visualize the relationships between your notes. | Yes |
| Importer | Converts files from various apps to Obsidian format. | Yes |
| Note composer | Allows you to merge or split notes. | Yes |
| Outgoing links | Shows all outgoing links for the currently active note. | Yes |
| Outline | Shows a table of contents for the current note. | Yes |
| Page preview | Preview a note by hovering over a link to it. | Yes |
| Properties view | List all the properties in your vault and see the properties for the current note. | No |
| Publish | Allows you to publish your notes if you have signed up for Obsidian Publish. | No |
| Quick switcher | Allows you to search, create, and open notes with your keyboard. | Yes |
| Random note | Opens a random note in your vault. | No |
| Search | Find files in your vault. | Yes |
| Slash commands | Perform commands inside the editor using the / key. Similar to the way Slack apps work. | No |
| Slides | Create a presentation from your notes. | No |
| Sync | Syncs your vault if you’ve signed up for Obsidian Sync. | No |
| Tags view | List all the tags in your vault. | Yes |
| Templates | Create notes with pre-defined templates | Yes |
| Unique note creator | Creates a unique note using a time-coded title. | No |
| Word count | Displays the number of words and characters for the active note. | Yes |
| Workspaces | Save your layouts and switch between them. | No |
At first I thought I’d go over all the details in each of these plugins in this article, but that would probably make this section 75% of the article. So, in this article, I’ll just going over the basics.
You can get to the list of core plugins by going to the Options section of Settings and click on the Core plugins menu item.
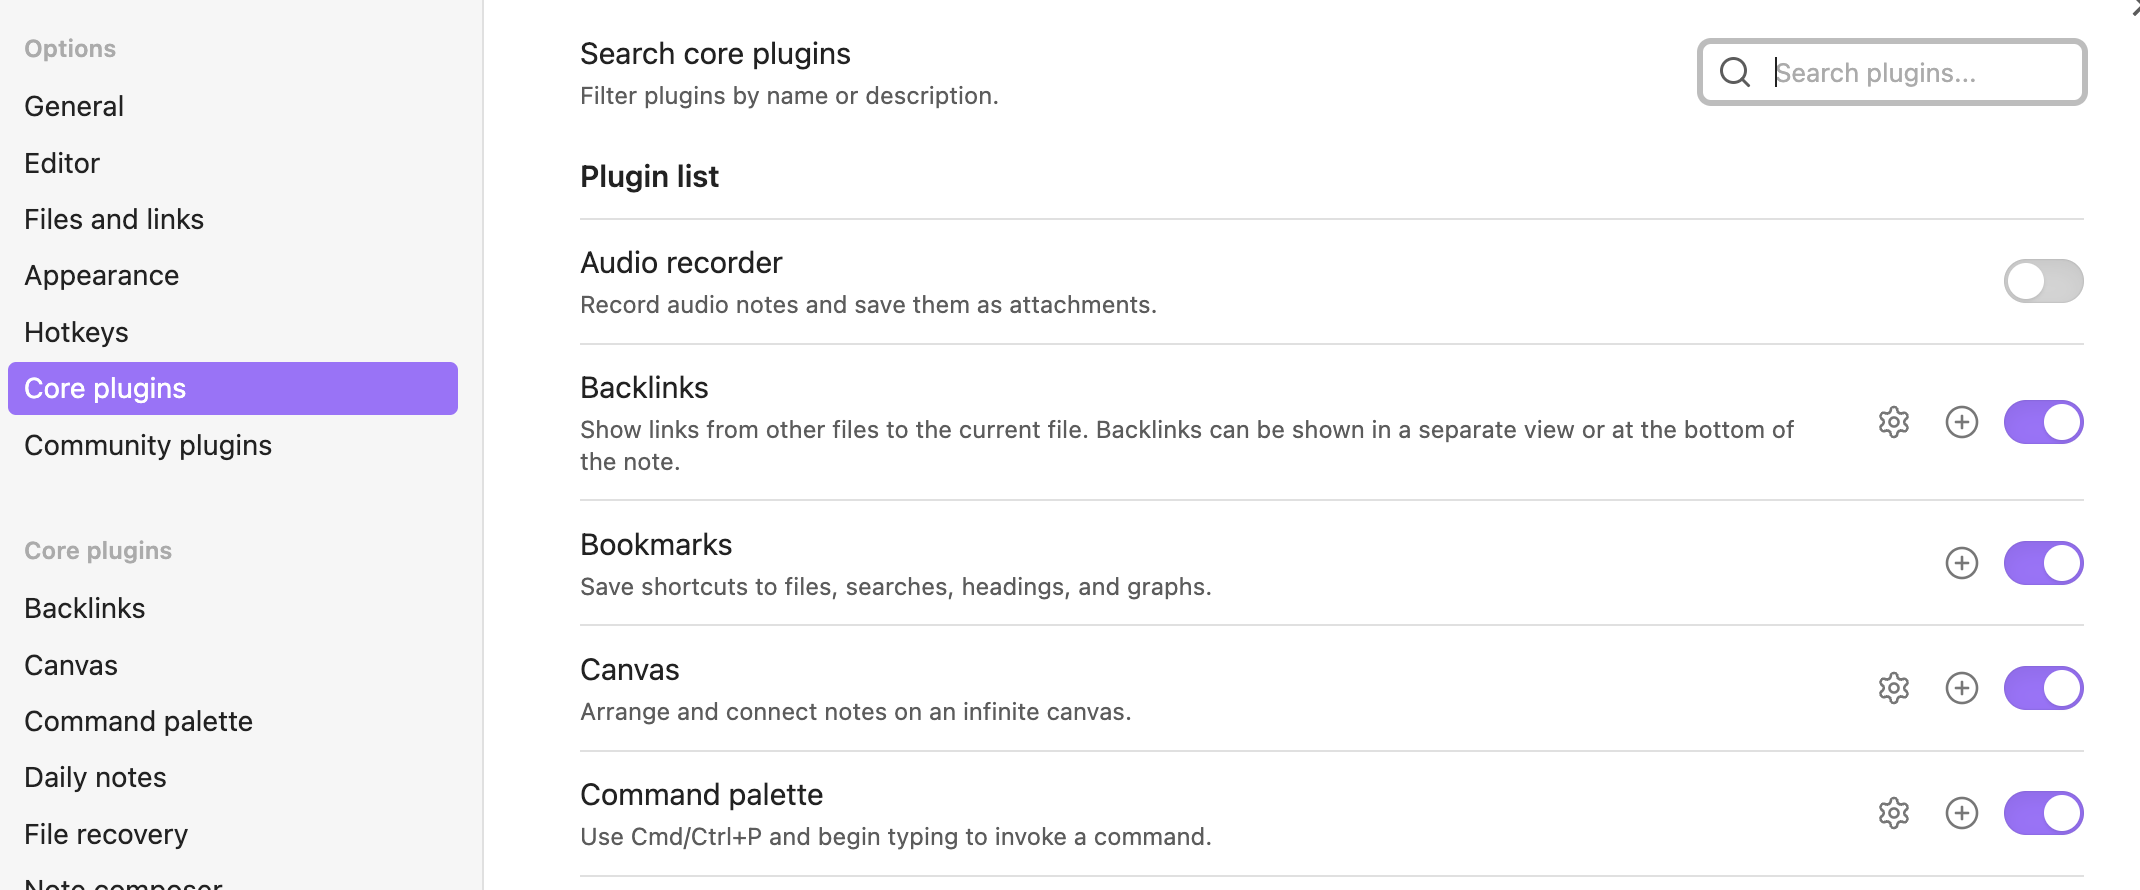
In this view, you can enable and disable the plugin with the toggle. The gear in the plugin row will take you to its configuration. Only some have this. You can also reach a plugin’s configuration by clicking on the name of the specific core plugin in the Core plugin section.
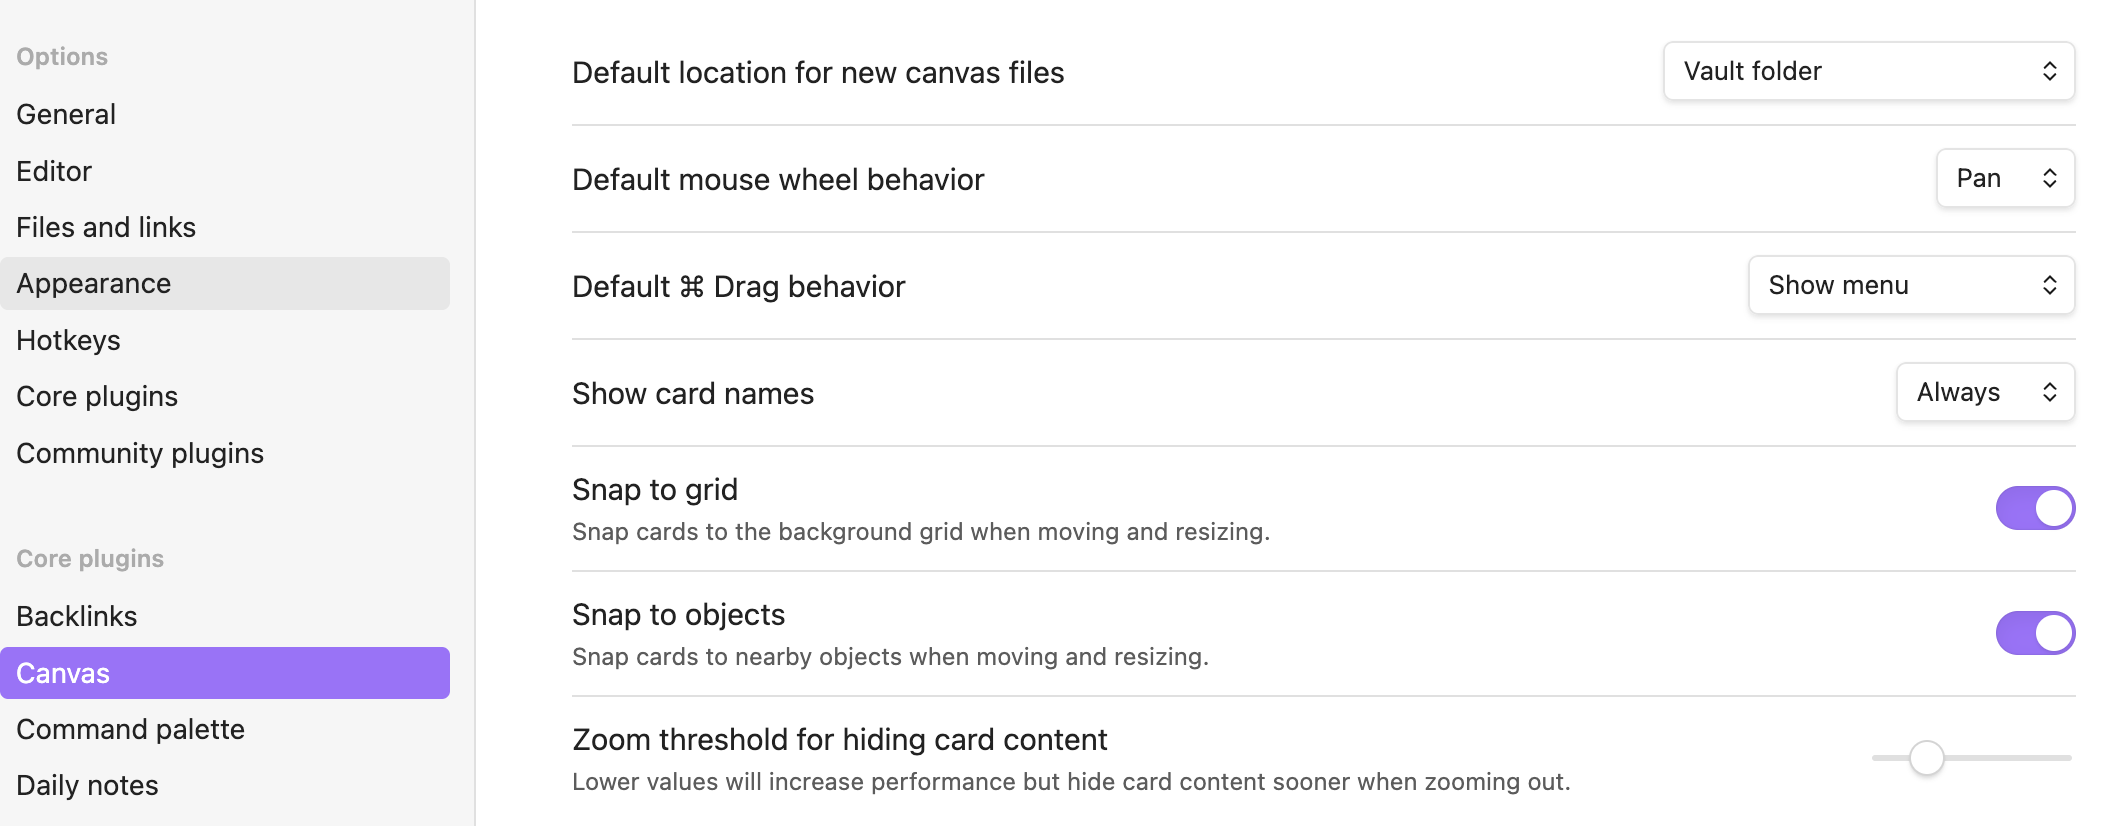
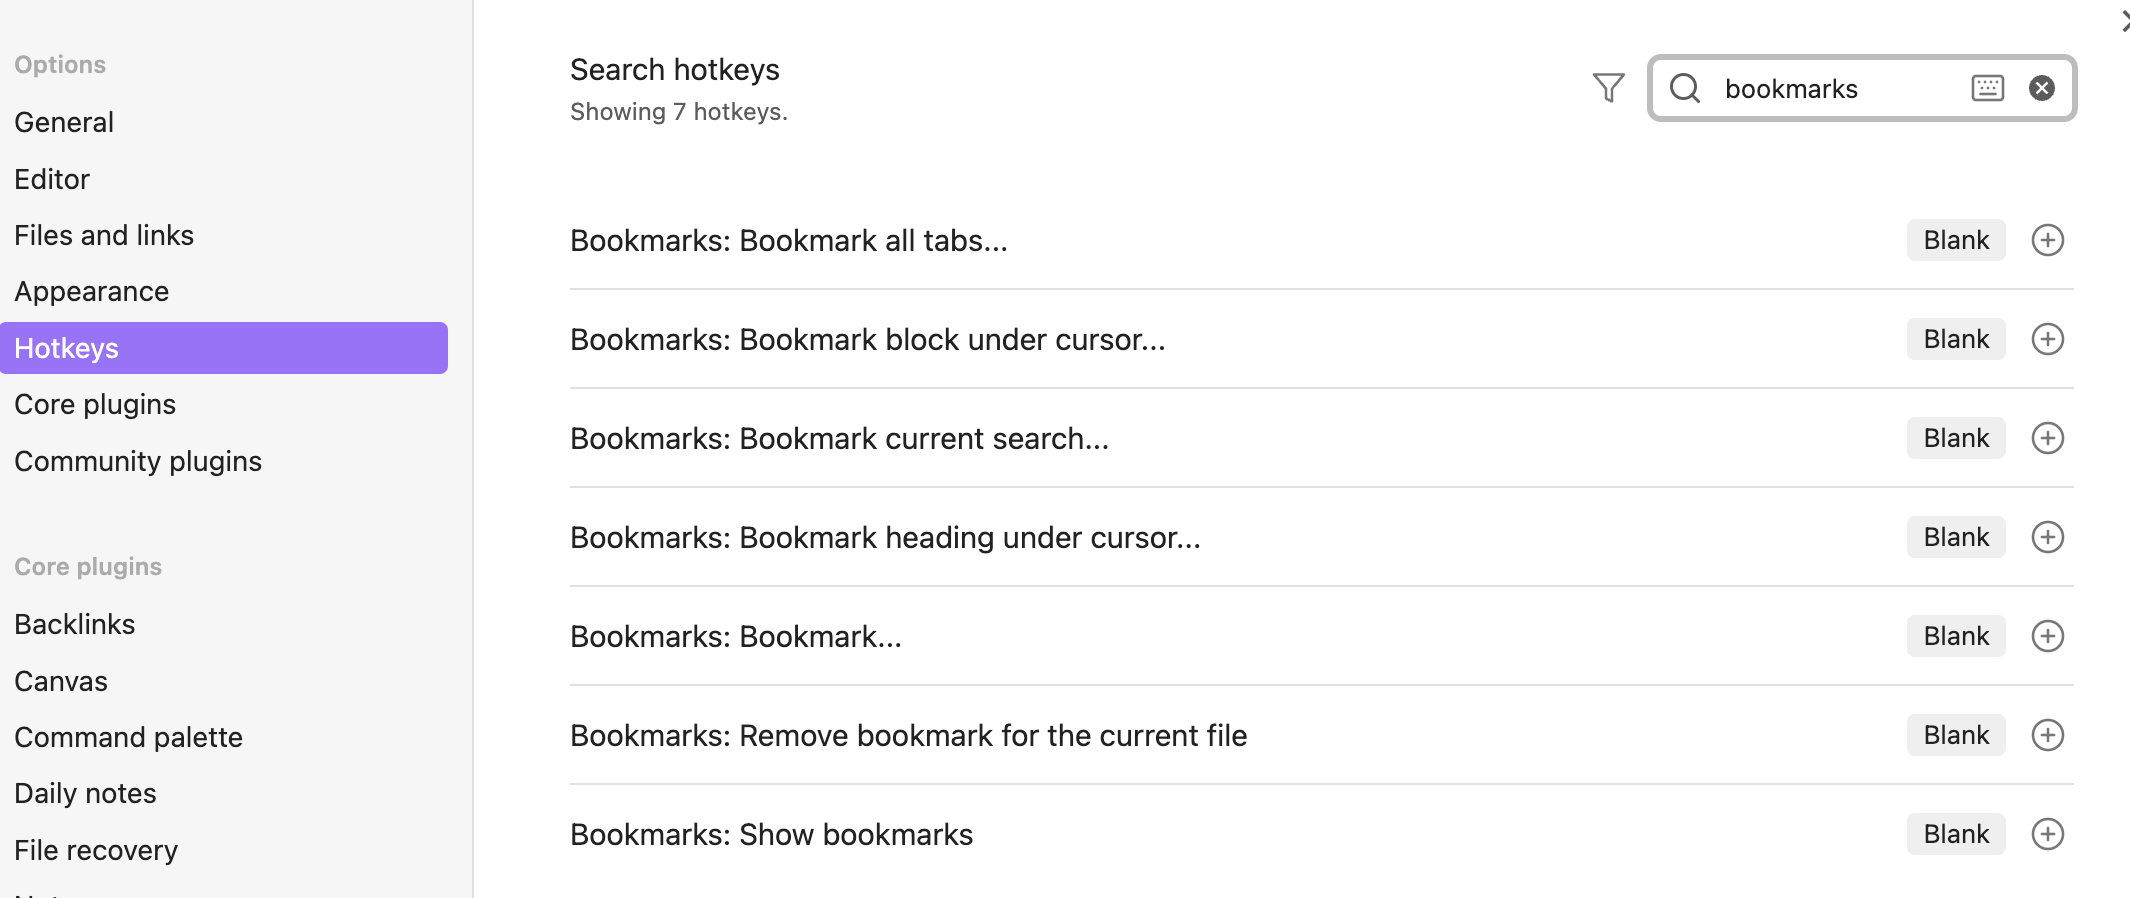
The plus (+) in the plugin row will take you to dialog for editing the plugins hotkeys (aka keyboard shortcuts). Some come with built-in hotkeys which you can edit. Some don’t, but you can add custom hotkeys to each of the plugin’s commands.
You can also go directly to the hotkeys by clicking Hotkeys in the Options section and search for a specific one.
How to Install Obsidian Community Plugins
In order to install community plugins, first, you have to enable the ability to install them. Go to the Options section of Settings and click on the Community plugins menu item. Then click the Turn on community plugins button.
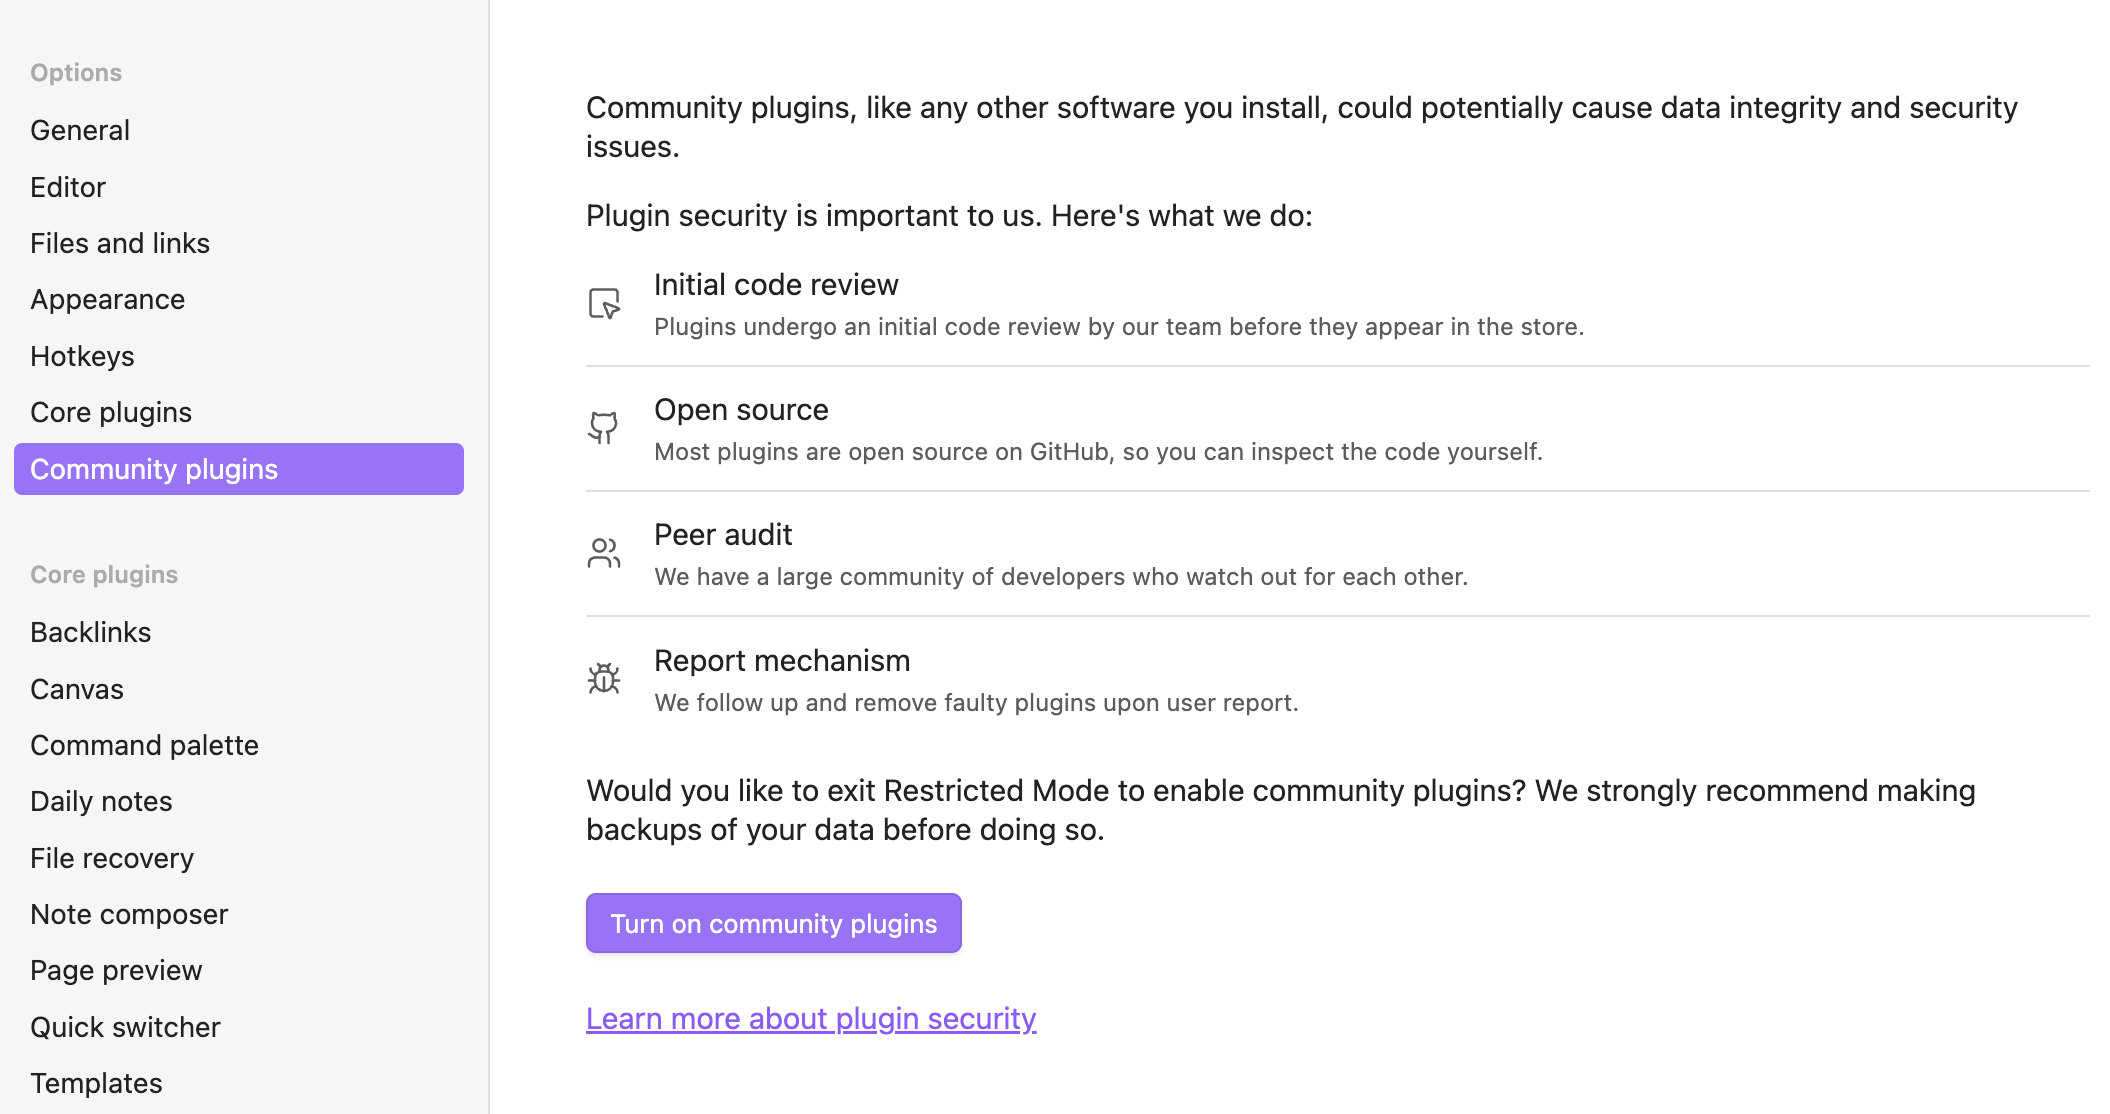
This will bring you to this screen. Click on the Browse button to search for plugins.

Which will take you to this screen, where you can search for plugins or actually browse, if you want, but there are currently 1,964 plugins available.

Once you find the plugin you want to install, click on its card, which will load documentation on the plugin, and a set of buttons. Click Install to install the plugin.
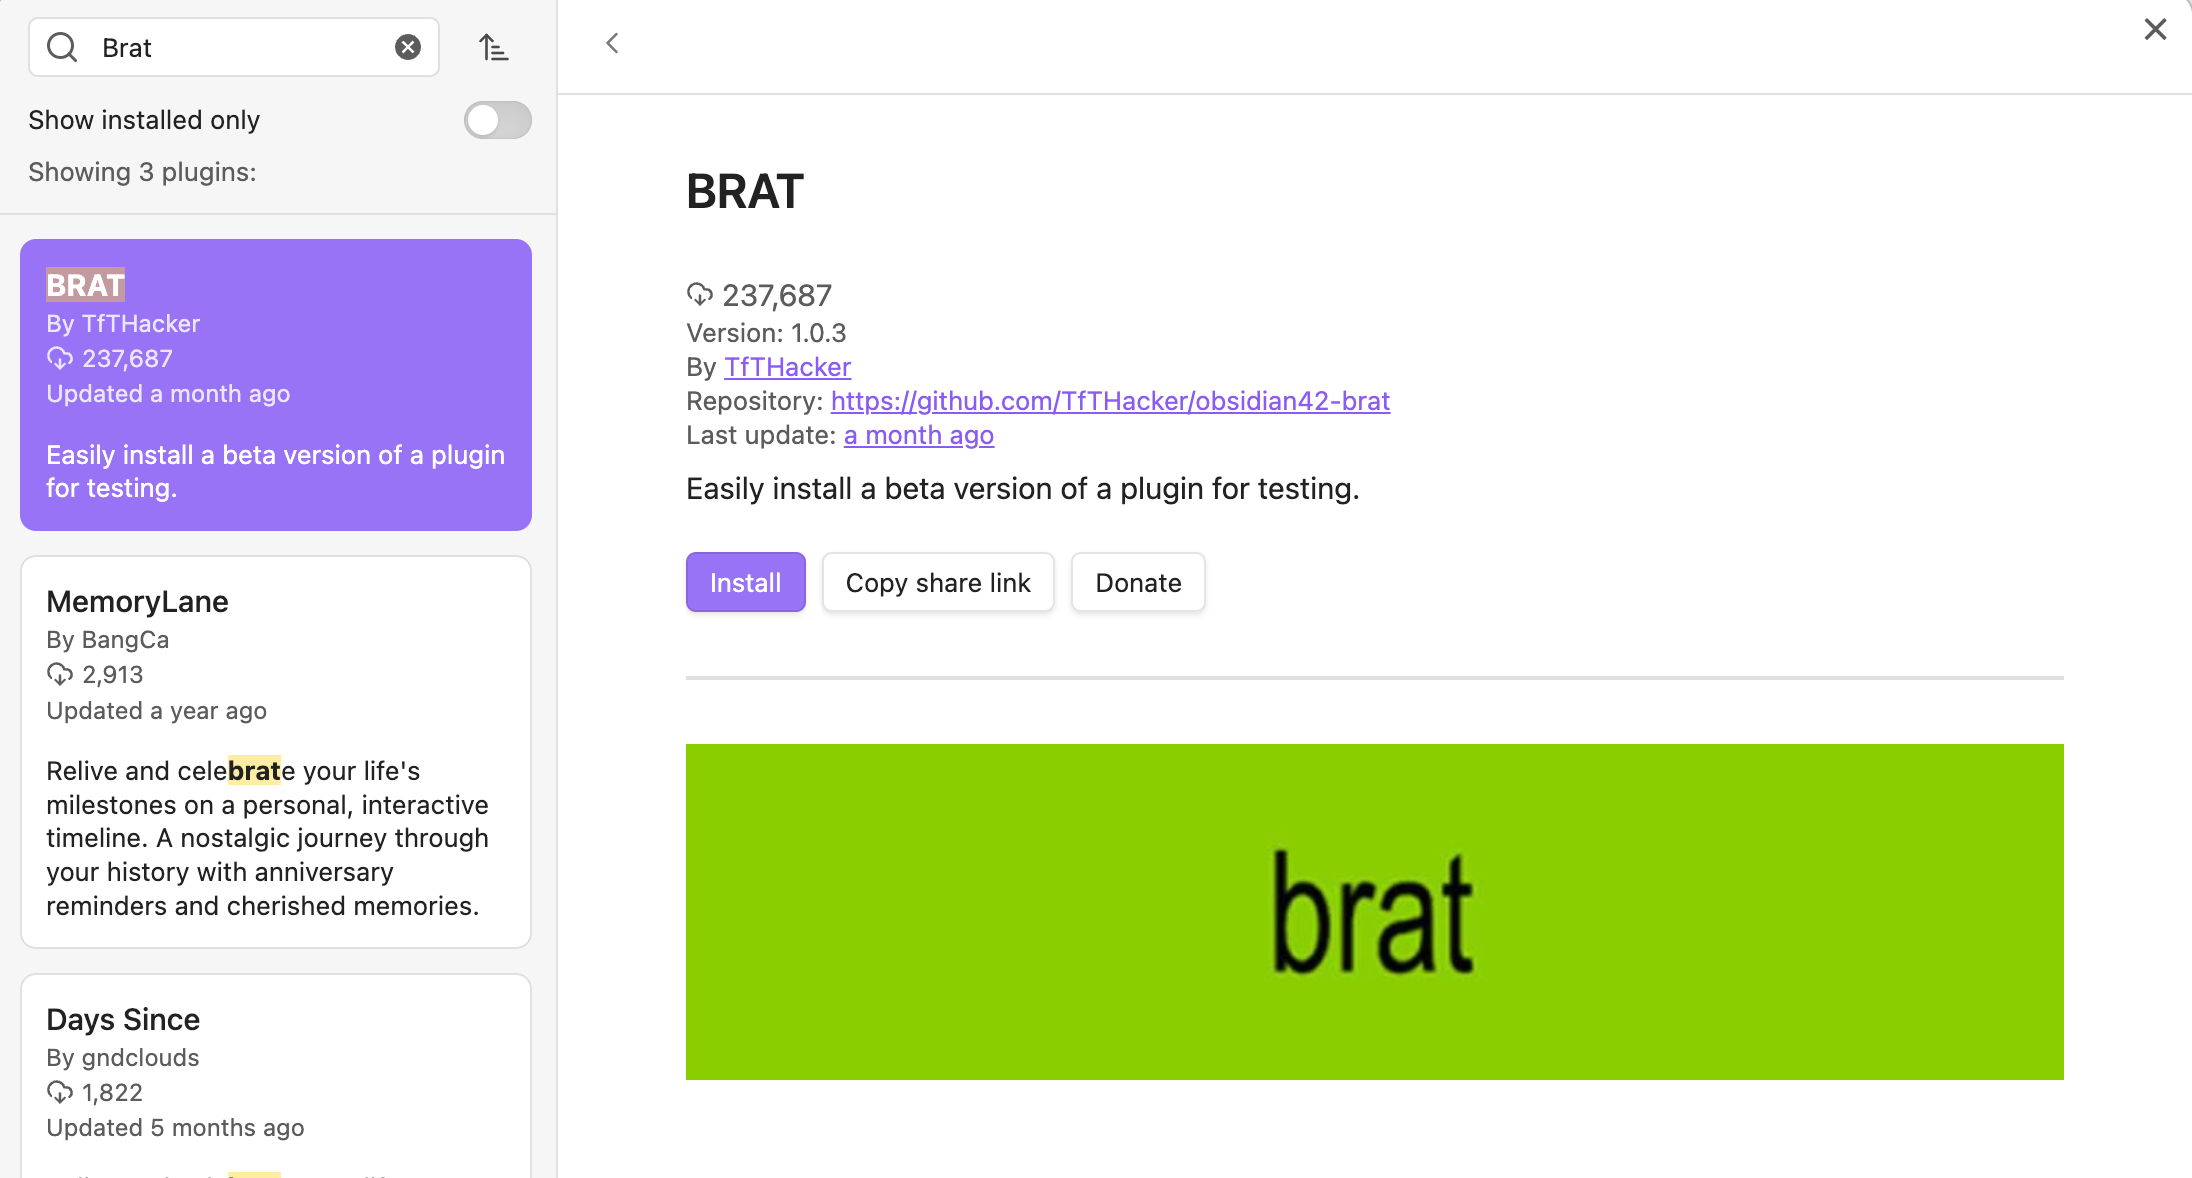
This just installs the plugin. Once it is installed, you can enable the plugin on the same page by clicking the Enable button:

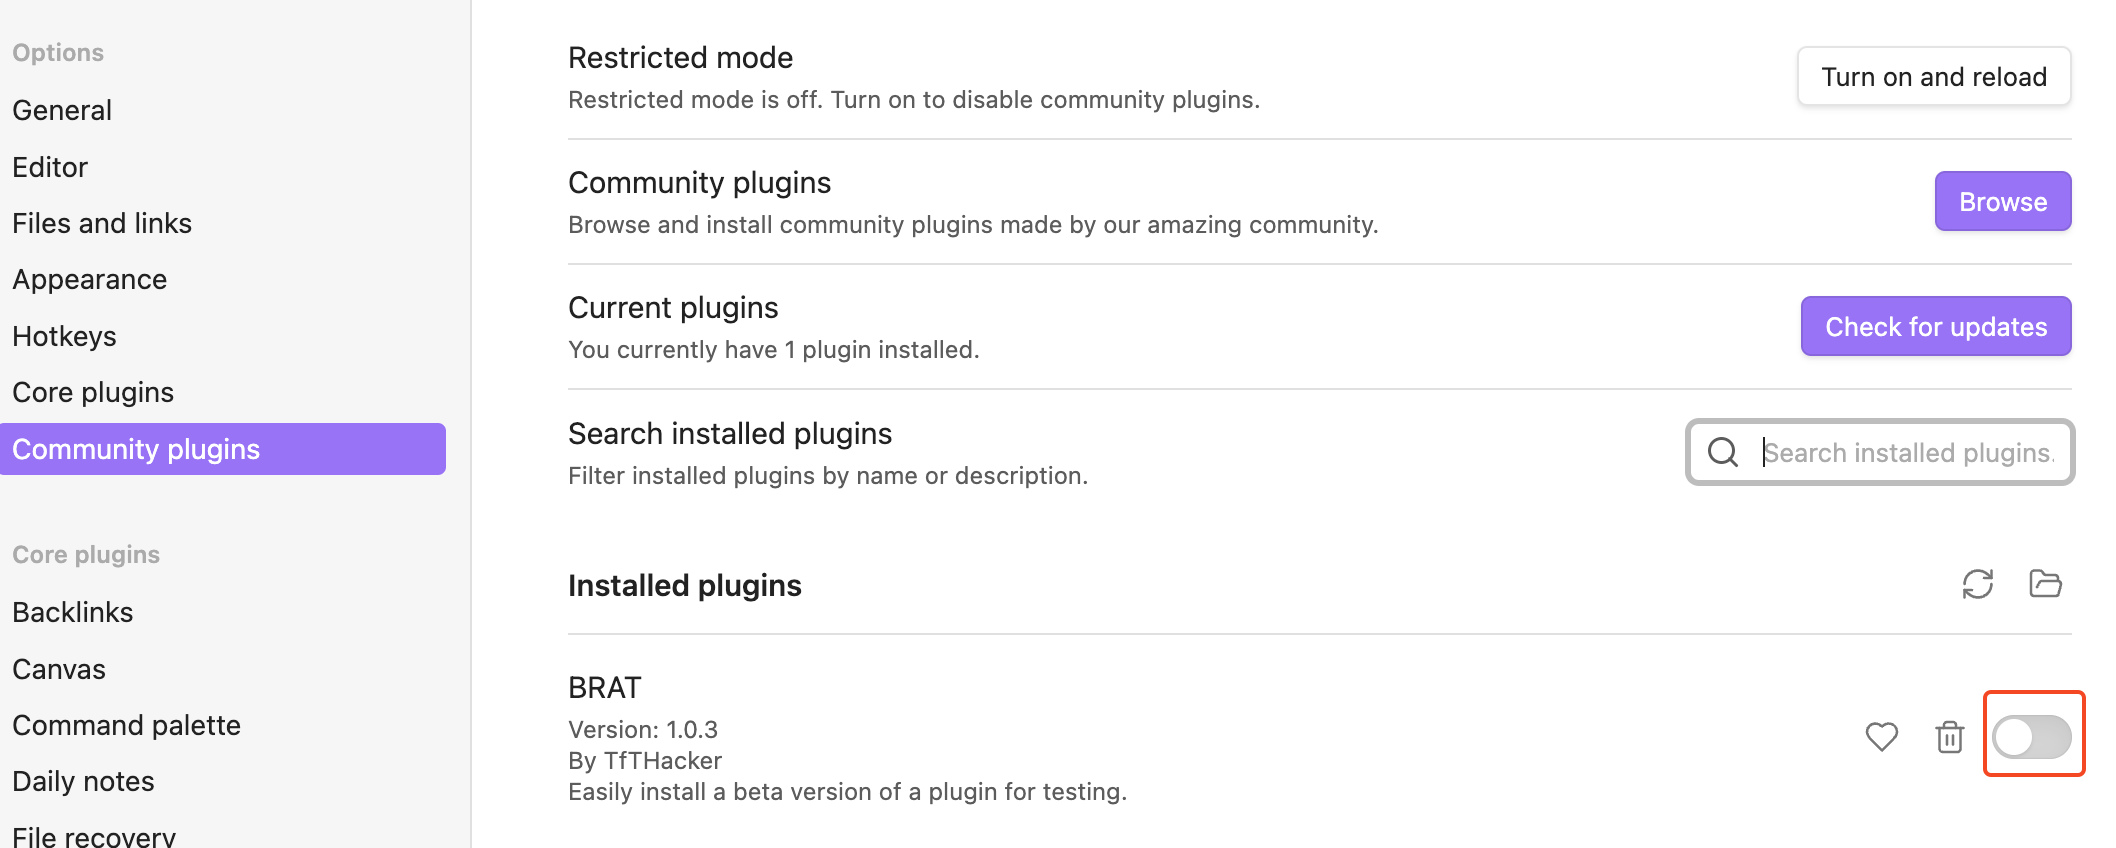
Or you can enable it in the Community plugins list by clicking on the toggle:
Popular Community Obsidian Plugins
This is a hard list to create, because there are close to 2,000 plugins and probably hundreds of use cases of Obsidian and the plugins that are “top” for you depend on your use case. But there have been a few that seem to show up on most online favorite lists and have a huge number of installs.
| Plugin | Description |
|---|---|
| Excalidraw | Add Excalidraw drawings inside of Obsidian. |
| Dataview | Allows you to create a table of data from the markdown files in your vault. I have a view that lists all blog posts where published in the frontmatter equals false to find my drafts. |
| Advanced Tables | Give you a toolbar that does advanced things with tables. If you ever tried creating tables in markdown manually, you’ll know why this helps. |
| Templater | This one I haven’t dug into, but I have installed it because I want to. “It defines a templating language that lets you insert variables and functions results into your notes.” |
| Tasks | Tracks tasks across your entire vault. I haven’t installed this, but it’s popular. |
| Calendar | Lets you visualize and navigate through your daily notes. I will probably use this. I just have to get into the practice of writing daily notes digitally instead of on paper. |
| Kanban | This plugin turns a markdown file with headings and task lists into a kanban and I use it all the time. Also why I don’t need the Tasks plugin. |
| Git | This is one of the many ways to sync your Obsidian vault, but I just use the Git plugin to keep backups and check diffs between my current vault and backups. |
| Iconize | Allows you to add custom icons to the files and folders in your vault so its easier to find what you need in the tree view. |
| Outliner | Allows you to drag and drop list items like Workflowy. |
How to Update Obsidian Plugins
Updating plugins is pretty simple and, depending on how many you have to install, something you have to do pretty often. I have to at least once a week. Obsidian and core plugins will update together when there is an Obsidian update, but community plugins have to be updated separately.
To check for updates, go to Settings and then Community Plugins and click the Check for updates button.

This will run for a few seconds, notify you will a snackbar with the count of plugins that can be updated, and then the button will change to Update all. Clicking this will do what it says.

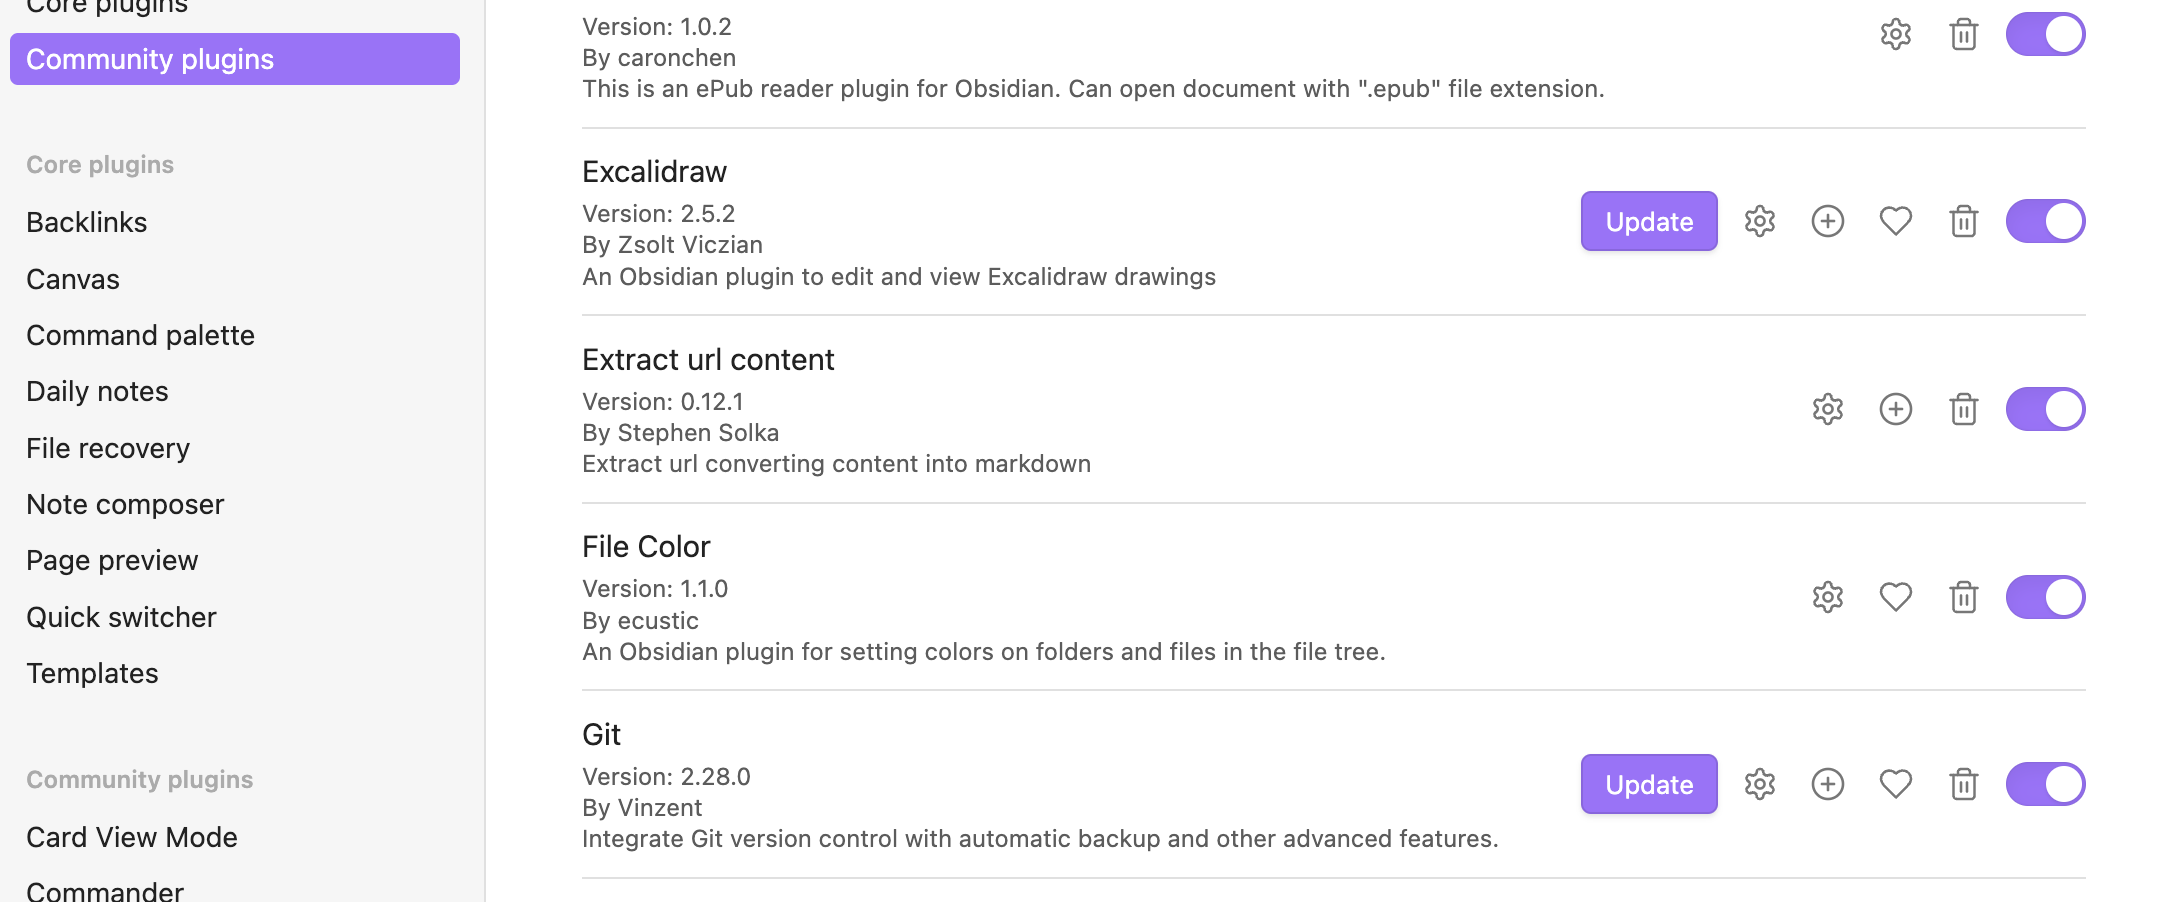
You can also update plugins one at a time, by scrolling down in the dialog and clicking the Update button in each plugin row.
If you don’t want to do this weekly, you can also install the “Plugin Update Tracker” plugin which will do the checking for you automatically, along with some other features.
![]()
On the other hand, if you are testing a beta plugin, you will have to update and install using the BRAT plugin, which the next section covers.
How to Install Beta Obsidian Plugins with BRAT
Many plugins that are still in development might require you to install the BRAT plugin. At first I didn’t know what this was and just skipped plugins that required it, but now that I know what its for, I give them the benefit of the doubt.
The BRAT plugin is for beta Obsidian plugins and themes. It stands for “Beta Reviewers Update Tool.” It allows you to install plugins that are still in development, but not yet in the list of community plugins. A good way to find beta Obisidian plugins is looking for “Add plugin” in the pull request list for obsidian-releases. Another place is the Share & showcase Obsidian forum.
Here’s how you use it.
First, install the plugin by searching for “BRAT” in Settings > Community plugins > Browse and make sure to enable it. The instructions for installing community plugins above walks you through the complete process.
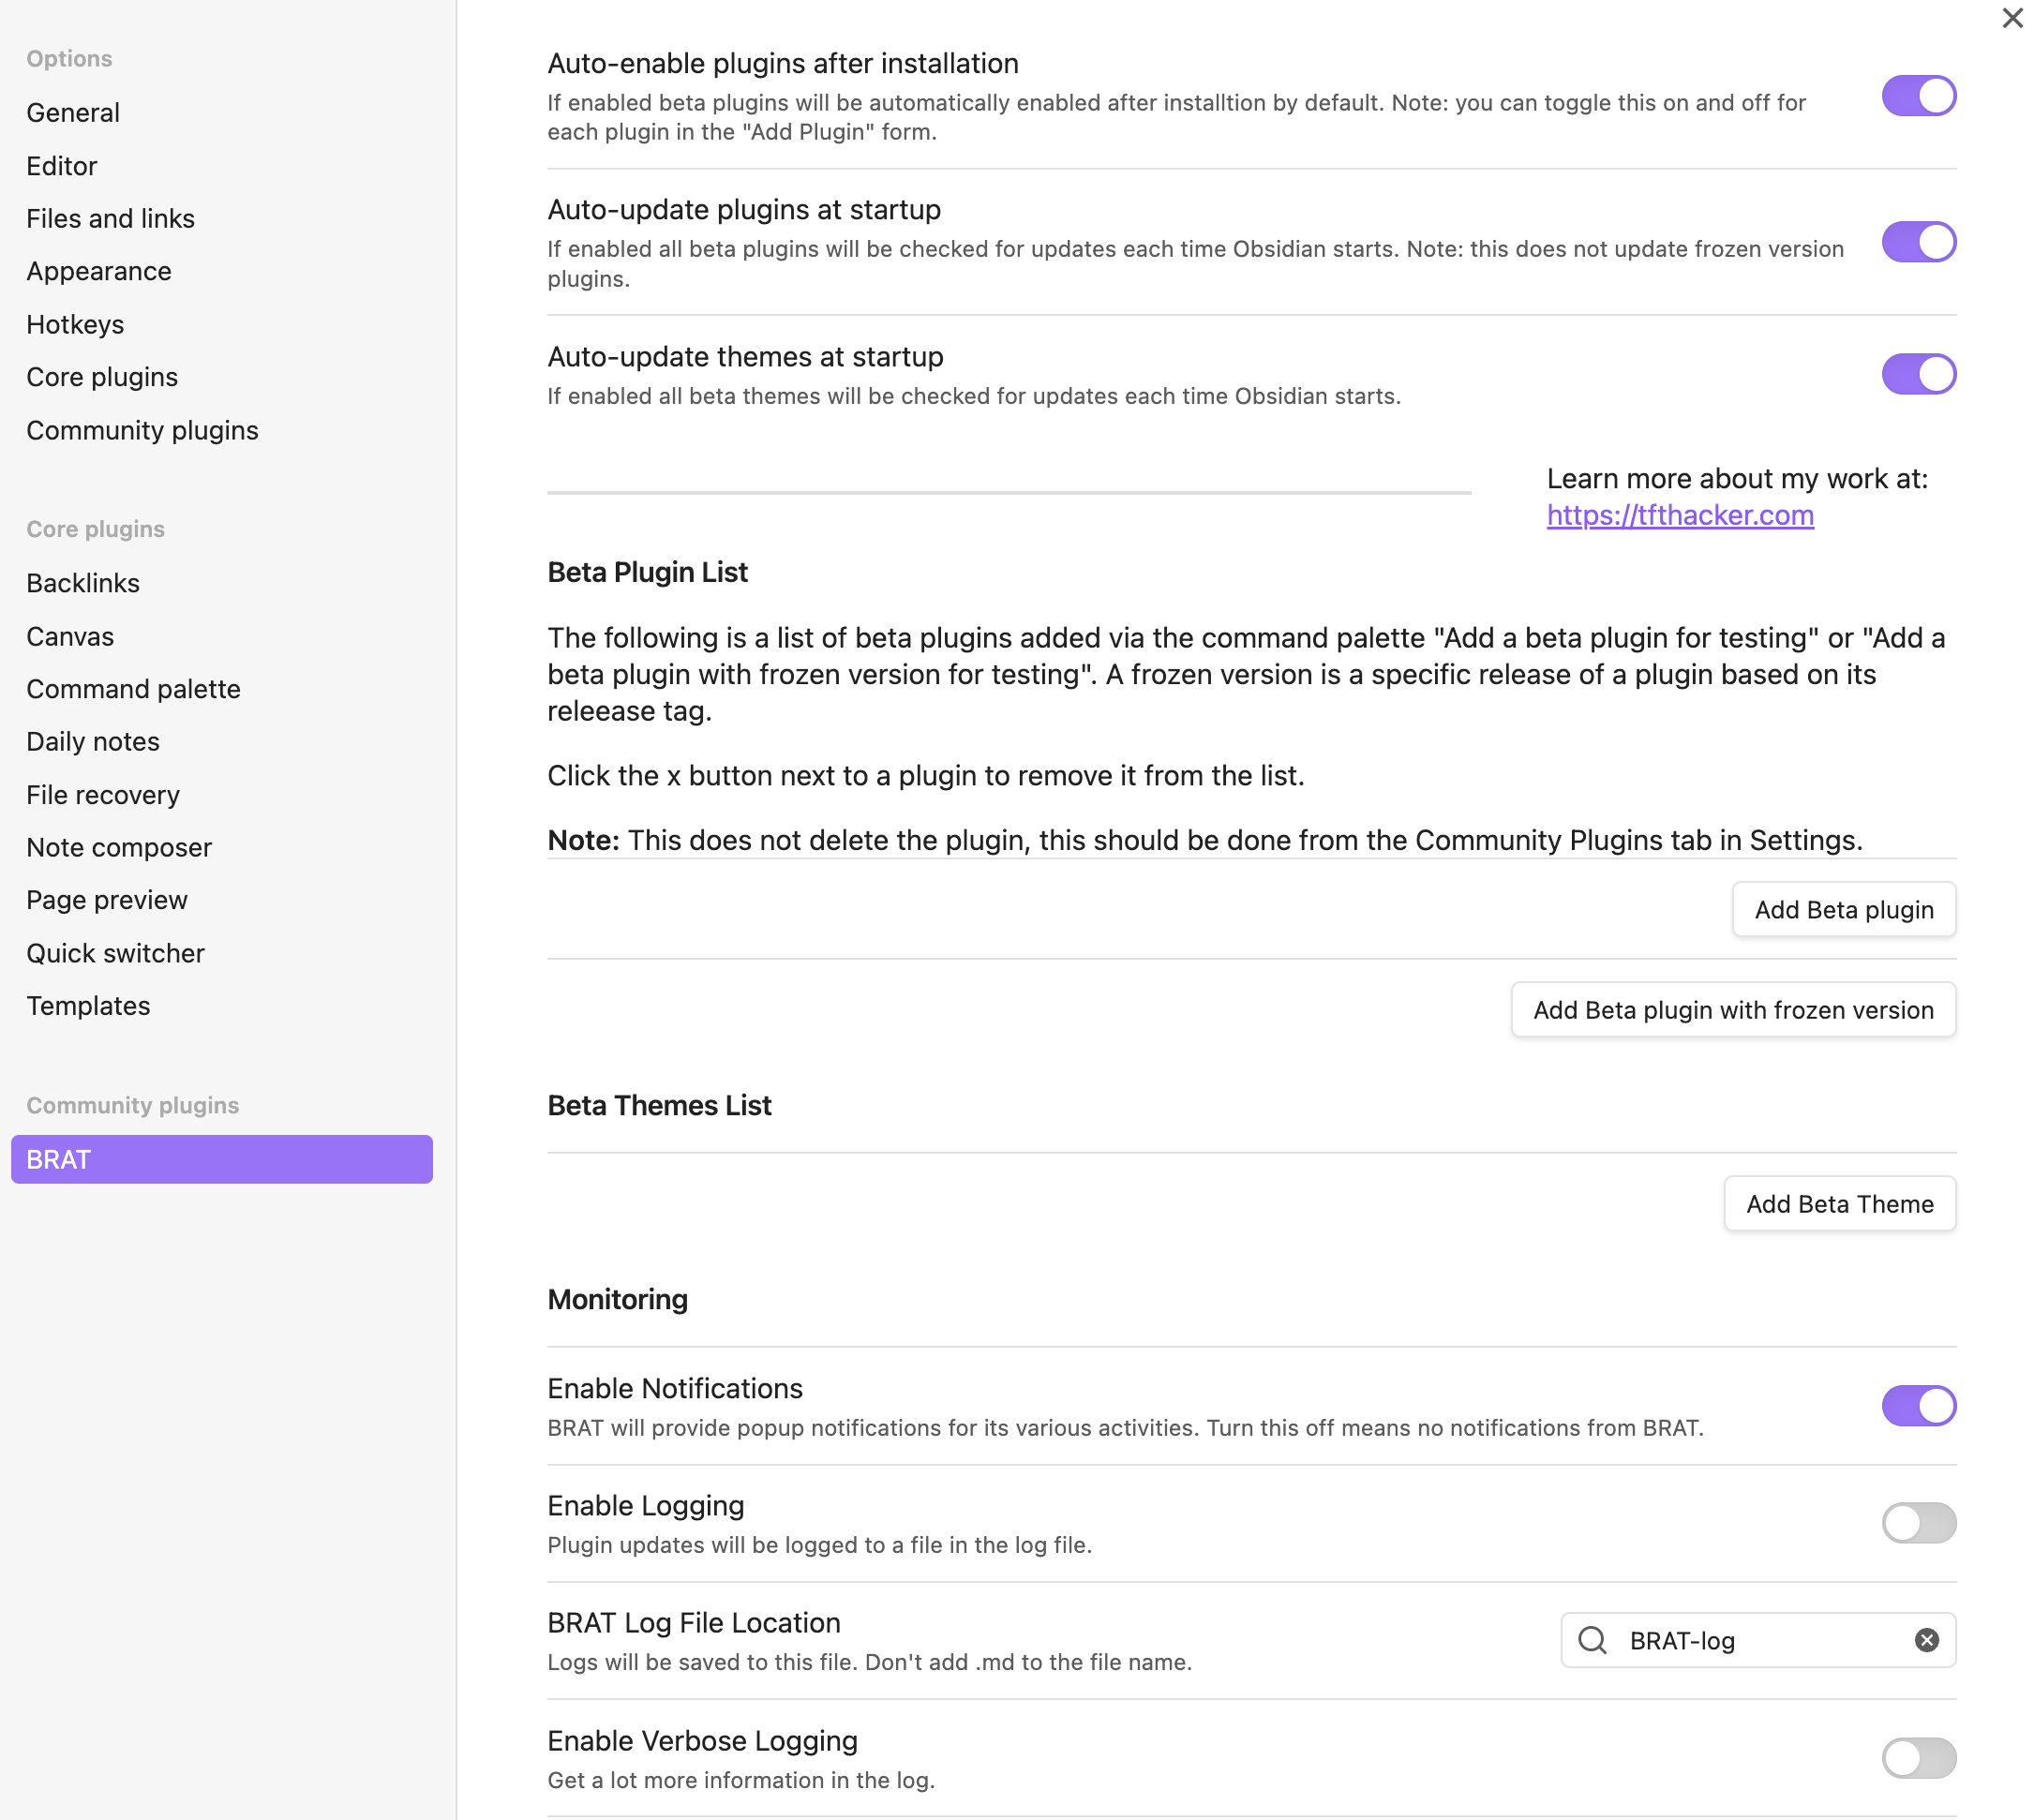
Here is its configuration page:
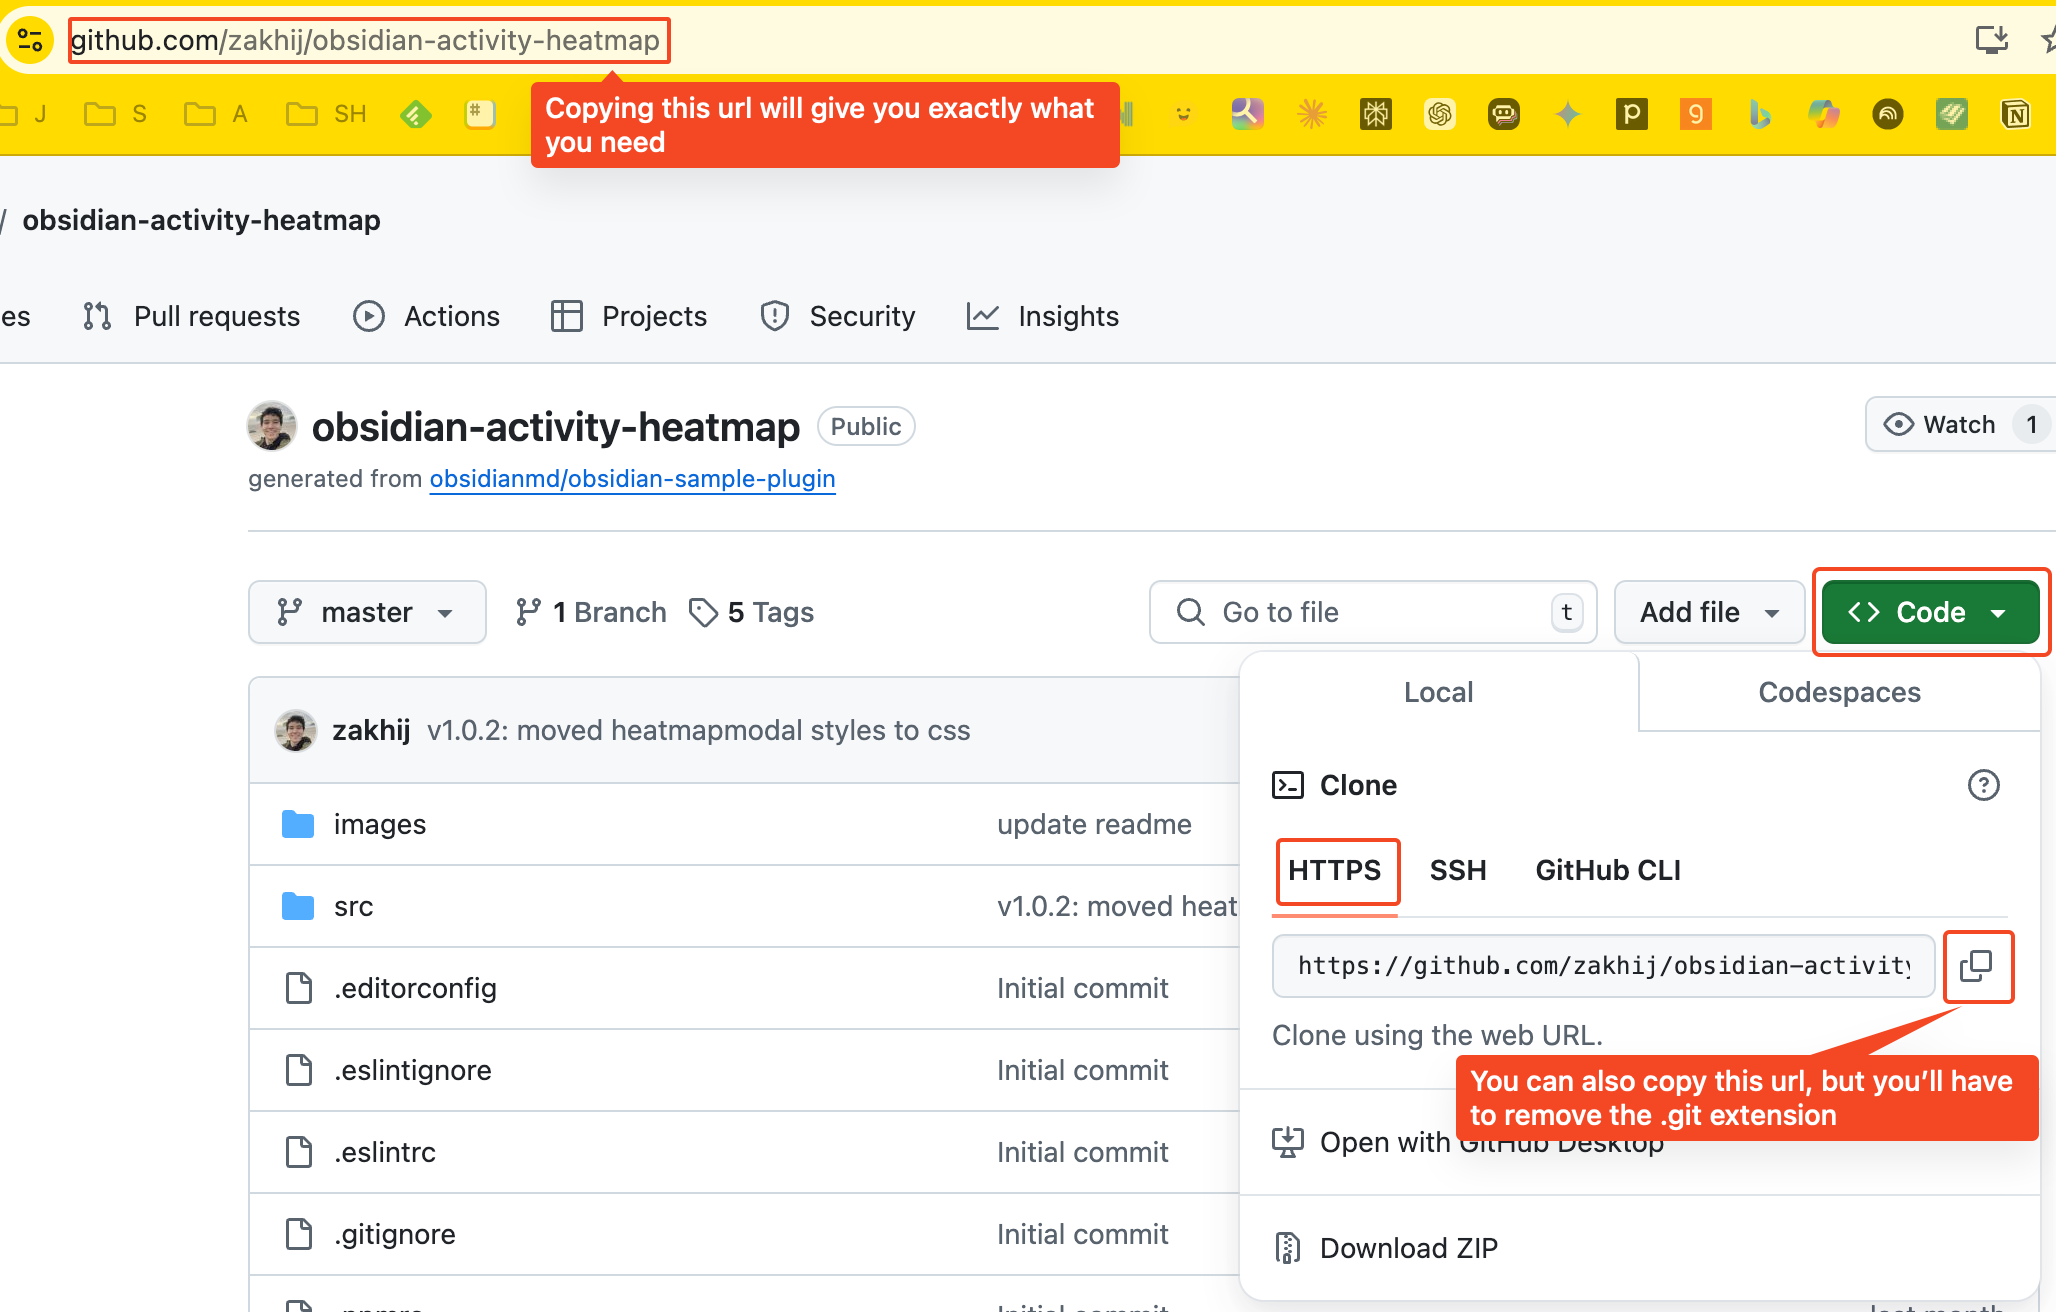
To install a beta plugin, first find its Github repo. For this example, I am going to install the Obsidian Activity Heatmap Plugin. So I am going to copy the Github url. There are two ways to do this. The easiest is just to go to the Github repo and copy the url in the browser. You can also click the Code button, choose HTTPS, and click the copy button, but you will have to remove .git from the end of that url.
Now go back to the BRAT configuration in Obsidian, and click on the Add Beta plugin button. You can also click on the Add Beta plugin with frozen version button if you don’t want to auto-update the plugin when the repo updates.
Then paste the url you just copied into the form that pops up (remove .git on the end if it is there) and click Add Plugin.
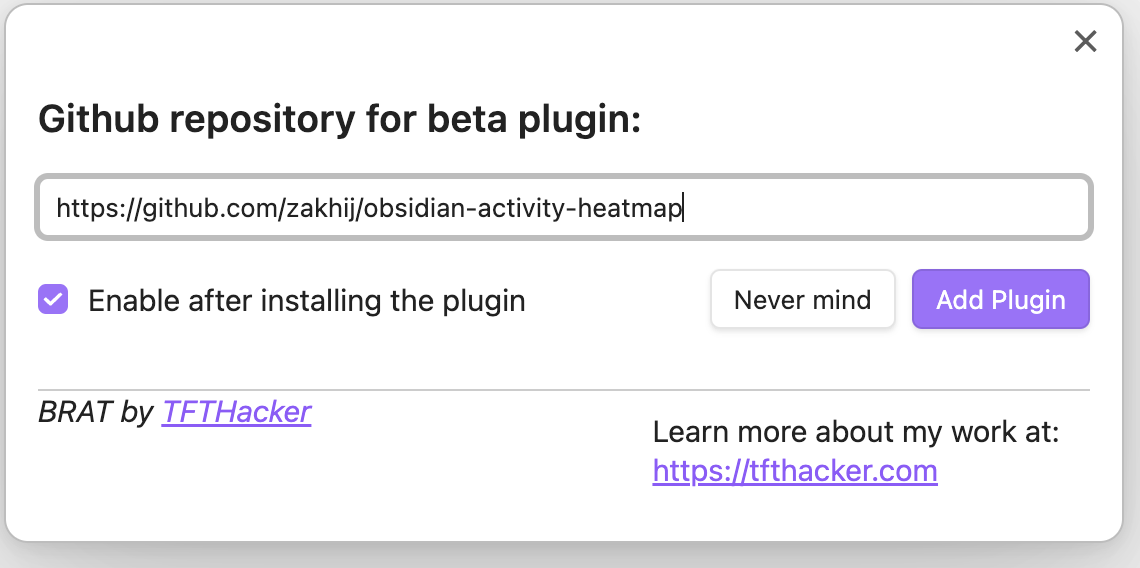
Once you do, you will see in listed in the BRAT plugin as well as in the Community plugins list.

For more information, check out this documentation on the BRAT plugin.
How to Install Obsidian Plugins Manually
If you don’t want to install beta Obsidian plugins with BRAT, you can also install them manually and it’s relatively simple, but not “just click a few buttons” or “paste a url” simple. These are desktop instructions. If you want to try in mobile, it should work similarly, but who would want to on a tiny screen?
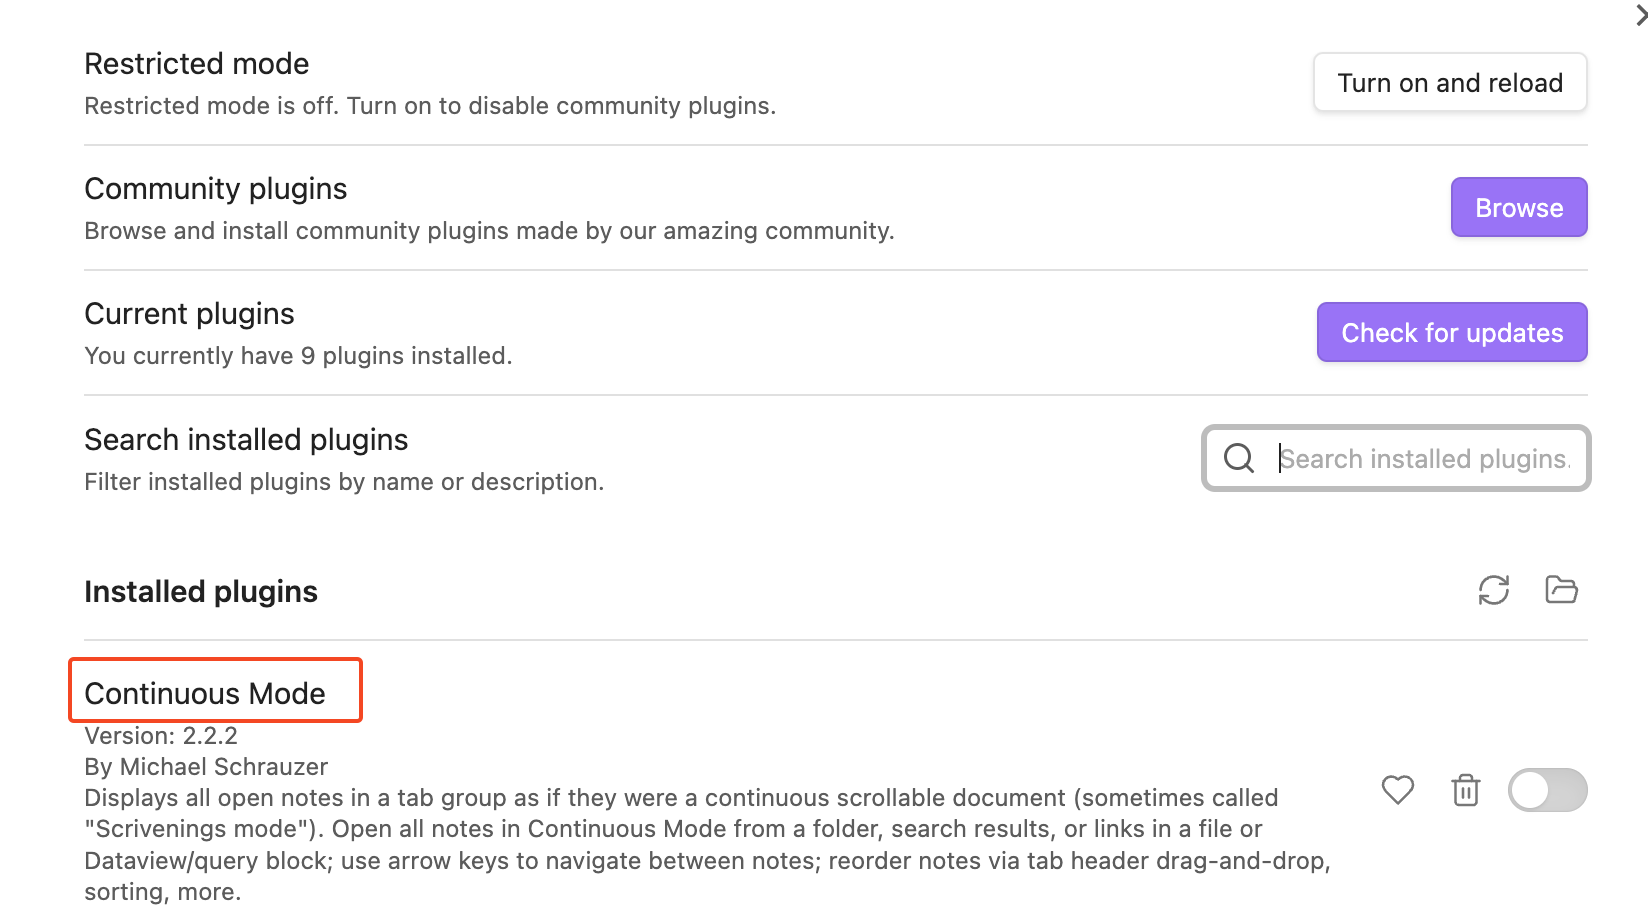
I will use the Obsidian Continuous Mode plugin as an example. This can be installed through the regular process, but here is how you do it manually. Go to the git repo where your plugin is located and download the whole thing as a zip file. See the image below:
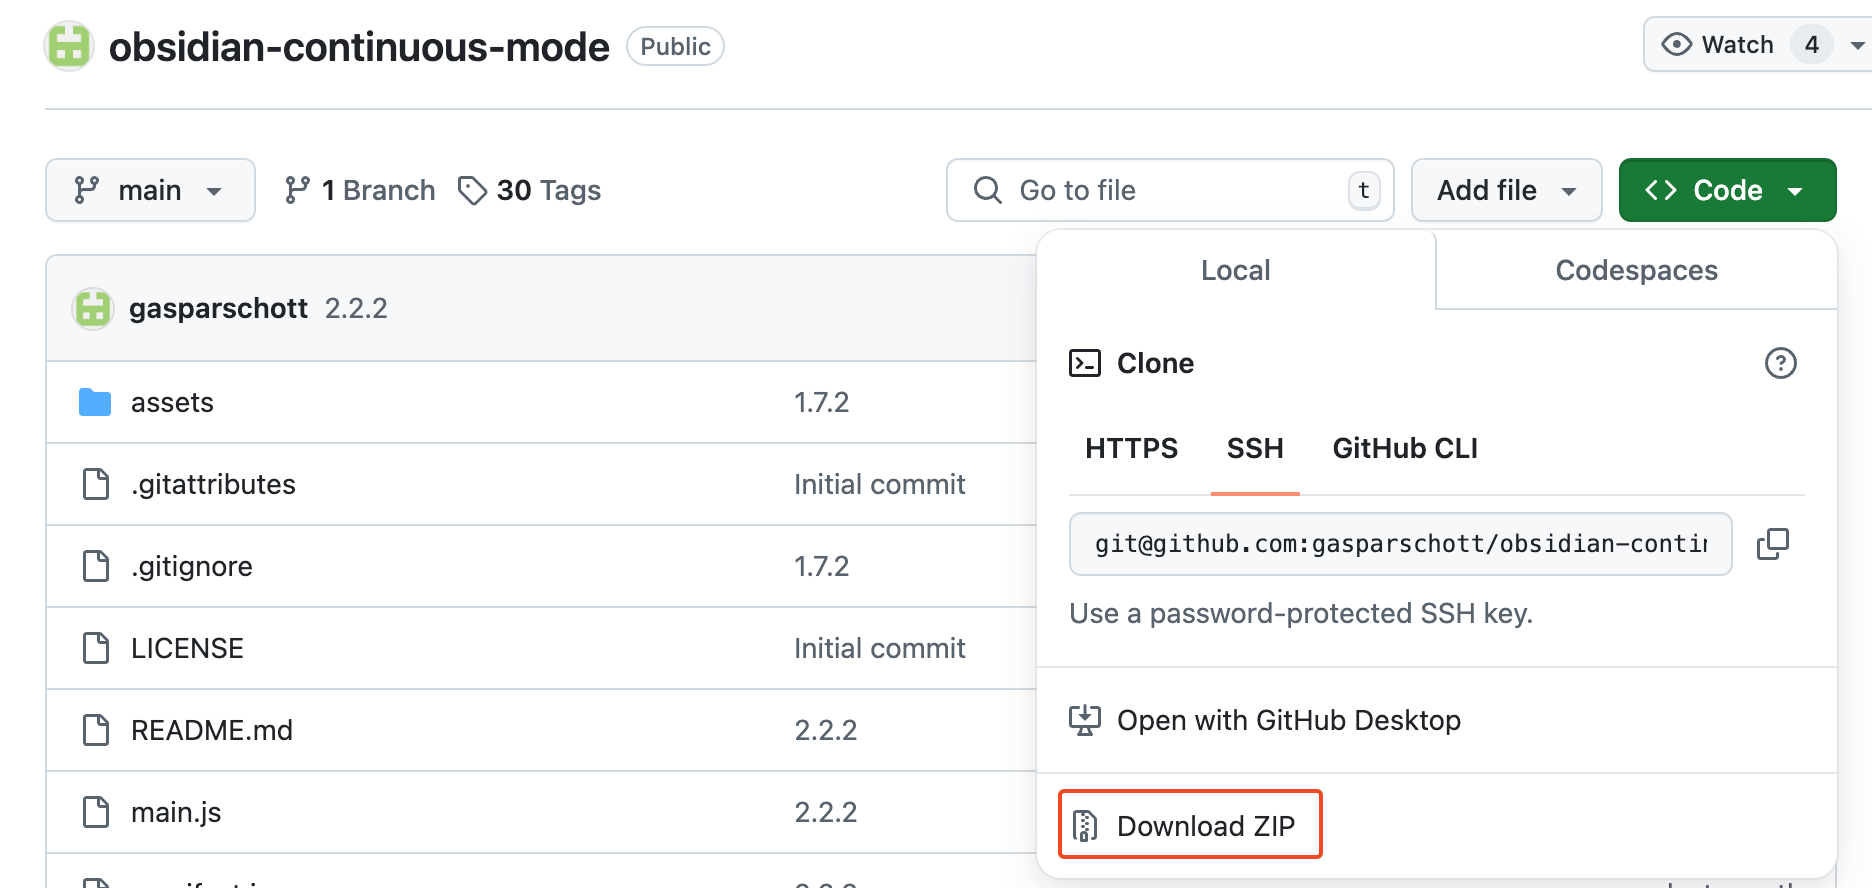
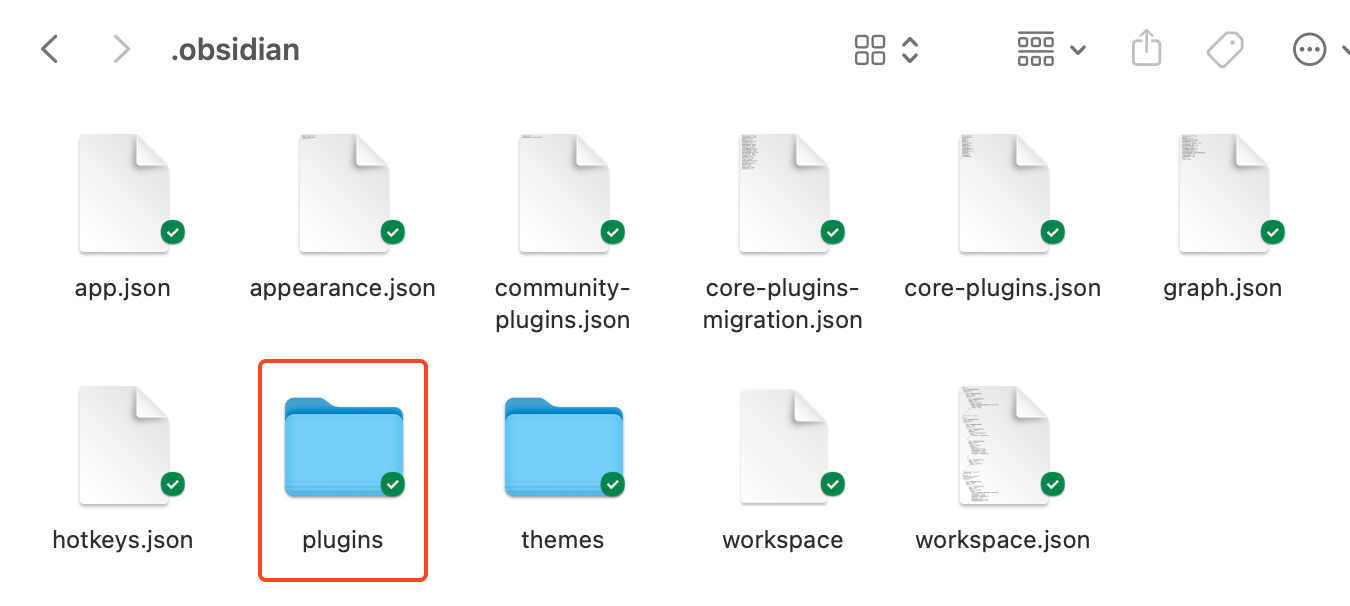
Let the zip file hang out in your download folder for now. Next, find your vault on your file system and open the folder. Inside, you should find a .obsidian folder. If you don’t see it, make sure that you are showing hidden folders, because this is one.

Inside this folder, you’ll find a plugins folder if you have already installed some. If not, create it.
Go back to the zip file you downloaded and extract it.

Now, drag the folder that was extracted to the plugins folder.
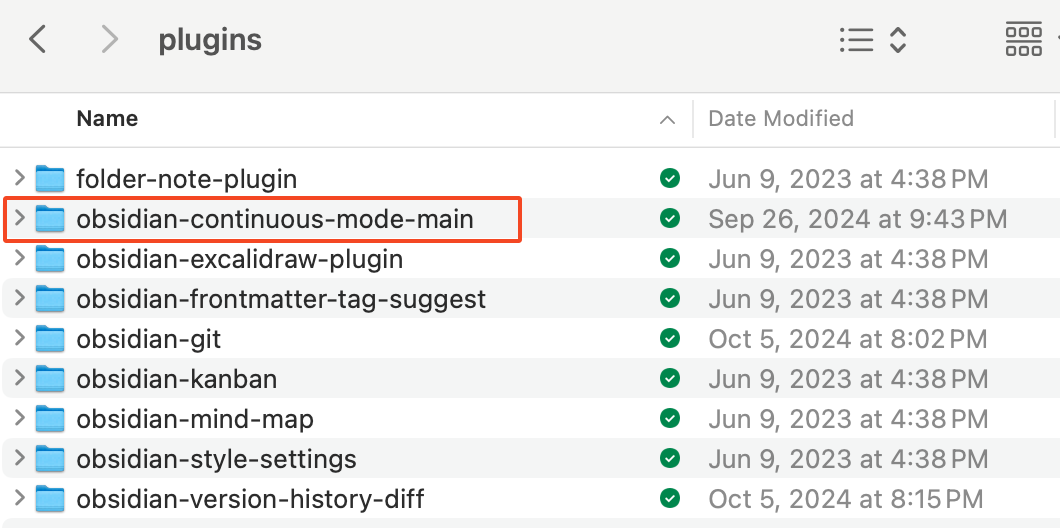
Then, open the vault in Obsidian and you should see the plugin waiting to be activated in the Community Plugins section of Settings.
How to Copy Plugins to a New Vault
So let’s say you have one vault that you’ve used for a while and you’ve installed like 50 plugins. Now you want to create a new vault and add the same plugins. Well, you can search for a plugin, click install, and repeat the process 50 times, or you can take the manual install method above a step further.
Simply open the vault that has the plugins you want to use in your file system, find the .obsidian folder, then the plugins folder and copy the whole plugins folder to the .obsidian folder of your new vault.
Obsidian Plugins that Work on Some Platforms But Not Others
You will run into this. Most of the time, it will be desktop plugins that won’t work on mobile. A good example is the Pandoc plugin, which allows you to export your notes as a PDF, ePub, or DOCX on your desktop if you have Pandoc installed.
On your desktop computer, it is relatively easy to install Pandoc, then the plugin, and have it work. But mobile is not the same. I went searching for how to install Pandoc on mobile devices and did not want to climb down that rabbit hole. And even if I accomplished that, setting up access to it from Obsidian is probably not straightforward either, if it’s possible.
So here is the Pandoc plugin on my iPad. I can click the activate toggle all day and it does nothing.
But what can you do? There are a few other reasons a plugin will work on one platform and not another, and usually the plugin documentation will tell you why.
Don’t Forget to Activate and Configure
I write this section because I always forget to activate the plugin. I find something new, click install, and want to see what it does. If you are installing a beta Obsidian plugin with BRAT, you can check the box to enable it after update. But I don’t know how many times I went closed the settings menu to see new features and saw nothing. So back to settings to enable the plugin.
It also doesn’t hurt to look at a plugin’s configuration (under the gear button in the plugin row) to see if you want to adjust anything there. I rarely do, but it doesn’t hurt to check.
And that’s all for now. This started as a simple “how to install Obsidian plugins” post, but grew to much more as I researched all the various ways you can do so. But for most use cases, all you really have to do is search for plugins inside of Obsidian and click install when you find them.


